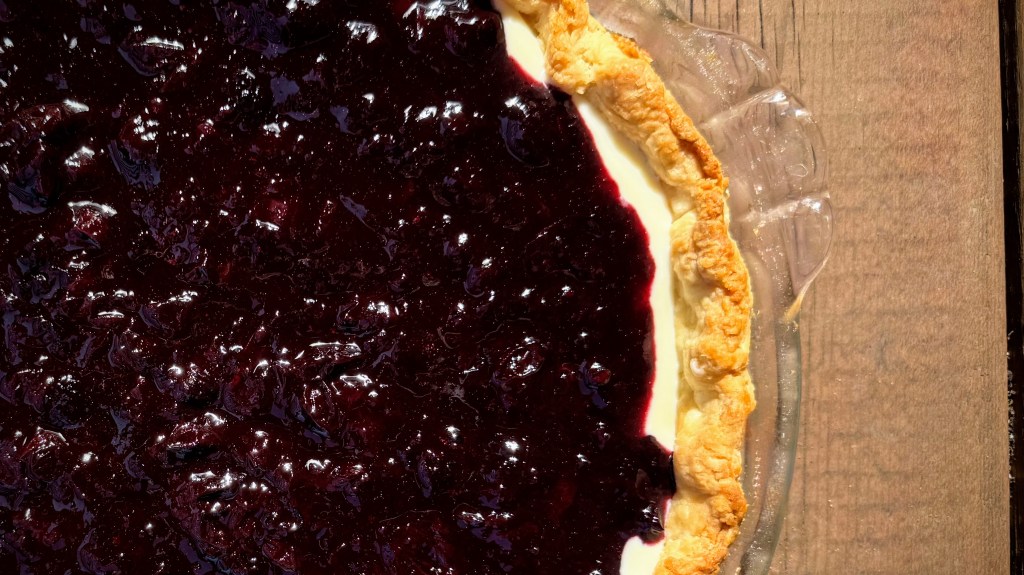
Hard as it is to believe, there are only a few weeks left of summer. Soon we will be fully bathed in pumpkin spice, but not today. Today there are still fresh blueberries to be had, and while they might not be as juicy and perfect as they were a month ago, they are ideal for pie.
Blueberry pie is a classic, but have you ever wondered what would happen if blueberry pie had a creamy vanilla layer in the middle? Only good things.
This recipe is really three recipes in one, the pie crust, the blueberry sauce, and the cream filling. I hope each one is useful on its own, but seriously, if you have time, you’ve got to try putting them together.
Now, on the subject of time, there are some challenges here. There are three parts to this recipe which all are cooked but need to be combined when cold. Your best bet is to make the components a day ahead, but for those of us who don’t have superhuman planning skills, you can also prepare them in the morning to serve that evening. Just make sure you have cleared out some fridge space.
Component 1: The Pie Crust
We are doing something called “blind baking”. I don’t know why it is called that, I guess because the crust and filling can’t see each other?
The key is to avoid shrinkage. If you aren’t careful, a pie crust baked without filling will shrink up faster than a wool sweater in the washing machine (which is pretty fast, in case you haven’t tried it). Luckily, there are a few things you can do to avoid your pie becoming a tart, these are set out in the steps below.
Ingredients:
- 1 1/4 cups AP flour (150g)
- 1/2 cup cold unsalted butter (113g)
- 1/2 tsp salt
- Really really cold water
Directions:
- Cut the butter into cubes
- In a medium bowl, stir together the flour and salt
- Add the butter and work it into the flour – use whatever technique you like. If you have a pastry cutter, this job will be easy, but it isn’t too hard with two knives and eventually just using your hands. Just a tip, if you tend to have warm hands, run them under cold water, you want to keep everything as cold as possible
- Now add the water, just a spoonful at a time, and mix until the dough just barely comes together into a ball – careful here, you will be surprised at how little water is needed
- Wrap the dough tightly and refrigerate for half an hour
- Roll the dough out on a floured surface and place it in your pie dish – we are only doing a bottom crust here so no need to save any for a top crust
- Anti-shrinkage tip: when you are rolling out the crust, try to think about pressing down rather than stretching the dough
- Stab the bottom with a fork a few times, this just releases steam while the pie crust cooks
- Line the dough with aluminum foil, pressing firmly onto the pie crust
- If you have pie weights (AKA old dry beans from the back of your cupboard) pour those on top of the foil
- Put the whole thing back in the fridge again (bonus points if you can fit it in your freezer)
- After at least half an hour, preheat the oven to 425 degrees
- Bake for 18 minutes, then remove the pie weights and foil while still hot (sorry about your fingers!) and return to the oven for another 15-20 minutes, until fully baked and lightly tanned, as would be expected for the end of summer
- Remove from oven and let cool completely
Component 2: Cream Filling
Our mission statement for this step is simple: NO SCRAMBLED EGGS! This is a pretty standard pastry cream filling, but there is a narrow line to walk. Stray too far one way and the flour won’t cook, leaving the cream gritty and with a strange taste. Stray too far the other way, and you will have the dreaded sweet scrambled eggs. You can fix under-cooking (by cooking more), but there is no coming back from the sweet scrambled eggs so watch this like a hawk while you are cooking it.
Ingredients:
- 1 1/2 cups whole milk
- 1/2 cup whipping cream
- 1/2 cup sugar
- 3 egg yolks (save the whites for some other use)
- 2 tbsp AP flour
- Pinch salt
- 1/2 tsp vanilla extract
- 2 tbsp butter
Directions:
- In a saucepan (or the microwave), heat the milk mixture until almost boiling
- In a separate saucepan, whisk together sugar, egg yolks, flour, and salt
- Slowly pour the heated milk into the egg yolk mixture – this is called “tempering the eggs” and helps avoid scrambling them
- Get yourself a cup of tea, a book, some music, or whatever else you need to be standing comfortably in front of the stove for a few minutes, this next step is a bit of a diva and requires constant attention
- Heat the mixture over medium heat, whisking constantly, until thickens and just starts to bubble – you must watch it with the intensity of a border collie watching a squirrel
- Now taste it – does it taste like flour? If so, give it a few more minutes. If the flour seems to have disappeared and the mixture is thick enough to coat the back of a spoon, take it off the heat now! Don’t debate, don’t stop to think about, remember our mission statement here
- Once the mixture is off the heat, add the butter and vanilla extract and stir well
- Transfer to a covered dish, and press saran wrap onto the surface to avoid a skin forming (unless you are one of those people who likes the skin, in which case, you do you)
- Put in the fridge to cool, it will thicken more as it does
Component 3: Blueberry Sauce
I debated between calling this blueberry filling and blueberry sauce, it is very much like a small batch of blueberry pie filling. This stage is the opposite of the blueberry filling, it thrives on neglect. Now is your chance to do all the multi-tasking you wished you could do earlier. Unload the dishwasher, water a plant, text someone, this sauce won’t mind as long as you check back in every few minutes and give it a quick stir.
Ingredients:
- 2 cups blueberries (frozen is fine too, no need to thaw them first)
- 1/4 cup sugar
- 1/8 tsp nutmeg
- 1/8 tsp cinnamon
- 1 tsp AP flour
Directions:
- Combine all ingredients in a saucepan
- Put the saucepan on the stove on medium heat
- Stir pretty regularly until the blueberries have released their juice (just to avoid burning)
- Simmer gently, uncovered, for 15-20 minutes, until the blueberries have cooked down, and the juice has thickened
Final Assembly
After all of those steps above, you will be happy to hear that the final assembly is simple. Just spread the cream filling in the pie crust, filling it about 2/3, then pour the blueberry topping over it. No one needs to know if there is any extra… Refrigerate again for at least a few hours before serving.
Notes:
- It is really important to refrigerate this after it is assembled. If you cut that time short, you will end up with a rather oozy dessert. It is quite oozy even if you do refrigerate it, if it falls apart on you don’t panic, just serve it with spoons. I promise no one will be upset.
 Measure With Your Heart